Release notes January 2023
Release notes February 2022
Dmitry Knysh
01.03.2022
Release notes
Bulk Editing of CRM Data via Excel File Import
What is this feature needed for?
This feature was designed for editing the existing entities (elements) of the CRM block: Company, Location, Property or Contact. You can activate/deactivate the Company, Location, and you can add/change the responsible employees.
Example: Redistribution of the client base between employees.
How does this feature work?
Preparing Import Files
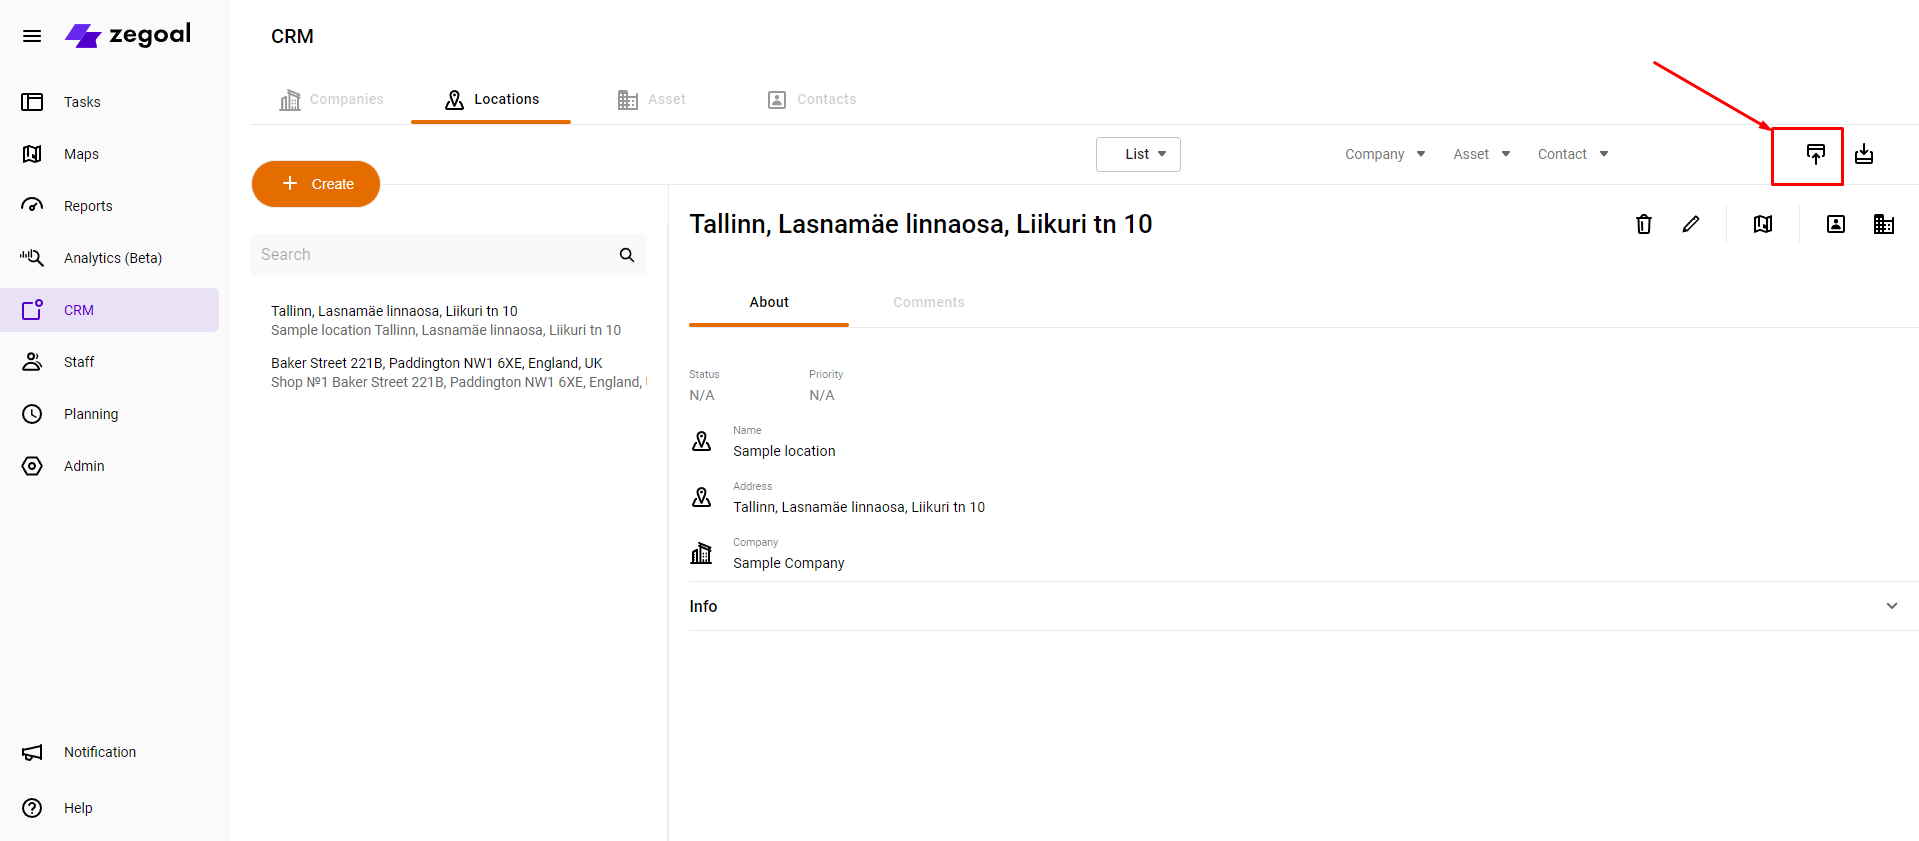
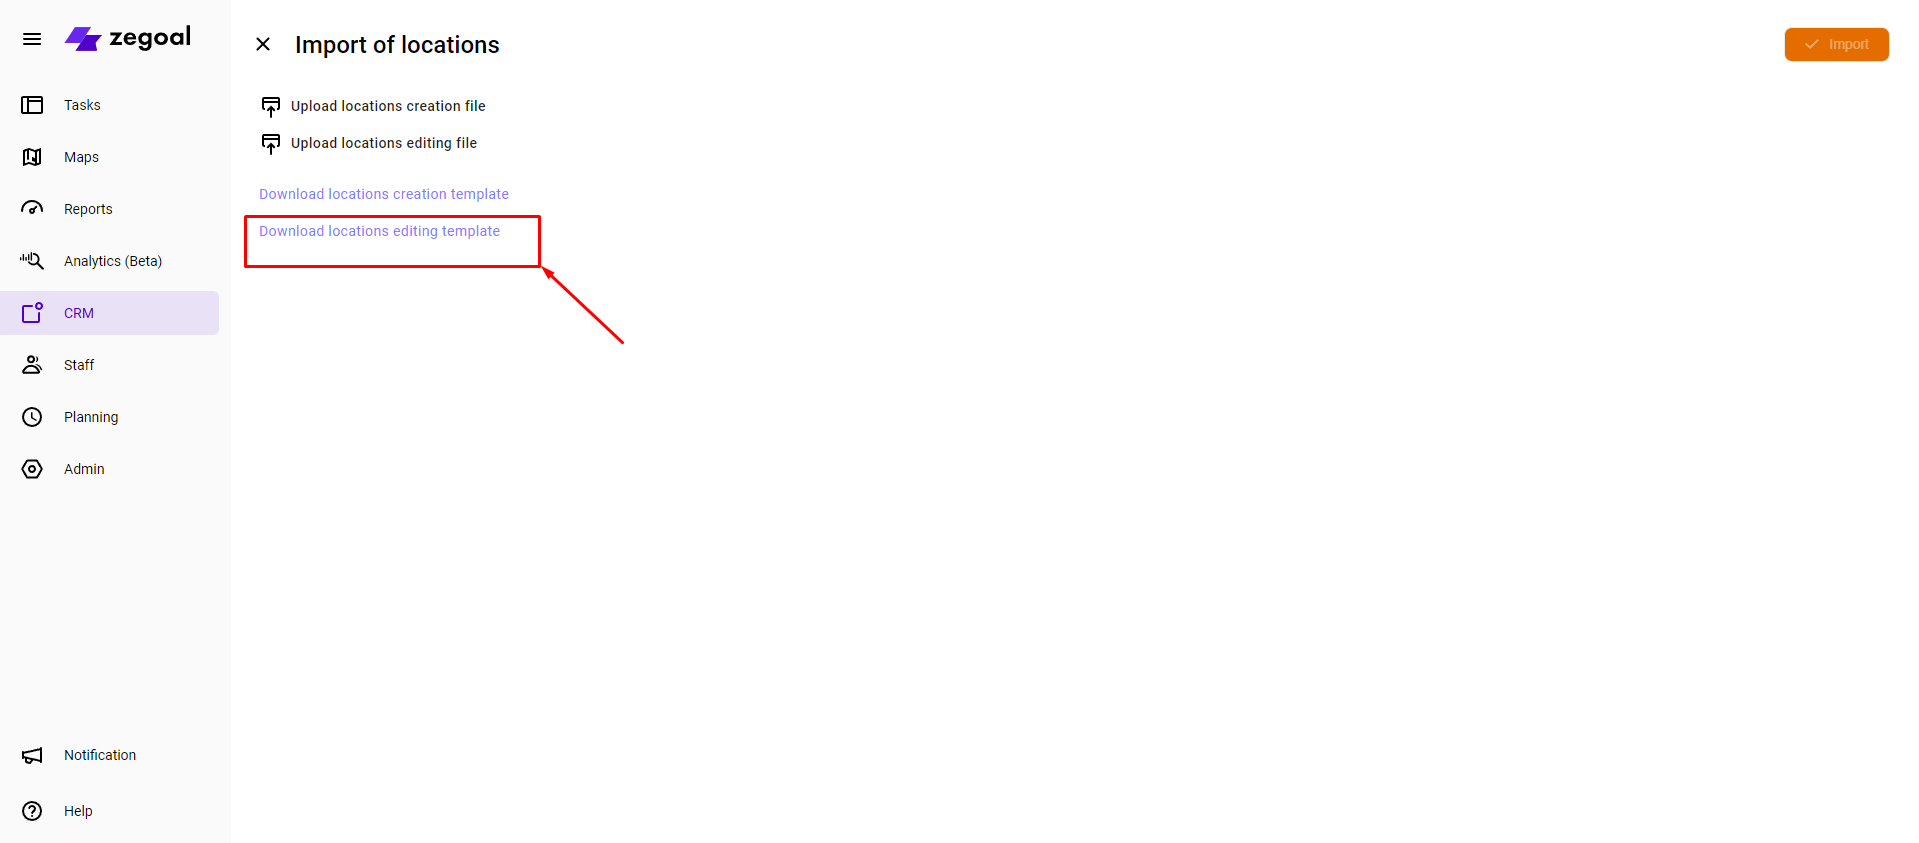
1. Download an import template. Go to the entity selected for editing (Company, Location, Contact, Property). Click the Import button. In the Import screen, click the Download Editing Template item.
2. Fill in the file template with the necessary data: entity ID, status (activate/deactivate), list of responsible persons (in the form of their logins separated by commas). Entity ID can be found in two places:
2.1 In the address bar of the browser when selecting a specific entity from the list;
2.2 From the entity export file. Go to the respective section of the selected entity. Click the Export button; as a result, you will receive an Excel file with a list of entities, their IDs and names. See the figure below.
Importing a Prepared File
1. Go to the element that you want to edit. Click the Import button.
2. In the Import screen, click Load Edit File, select the pre-created edit file and click the Import button. The data will be imported into your account, and the information in the CRM block will be updated.
Exporting CRM Data
What is this feature needed for?
This feature was designed for faster and more convenient creation of files for importing tasks, as well as editing entities of the CRM block.
How does this feature work?
Go to the respective section of the selected entity. Click the Export button.
As a result, you will get an Excel file with a list of entities (Companies, Locations, Contacts).
Importing tasks for selected dates from a file
What is this feature needed for?
This feature was designed for bulk import of tasks with reference to specific dates via importing from a file.
How does this feature work?
Preparing Import Files
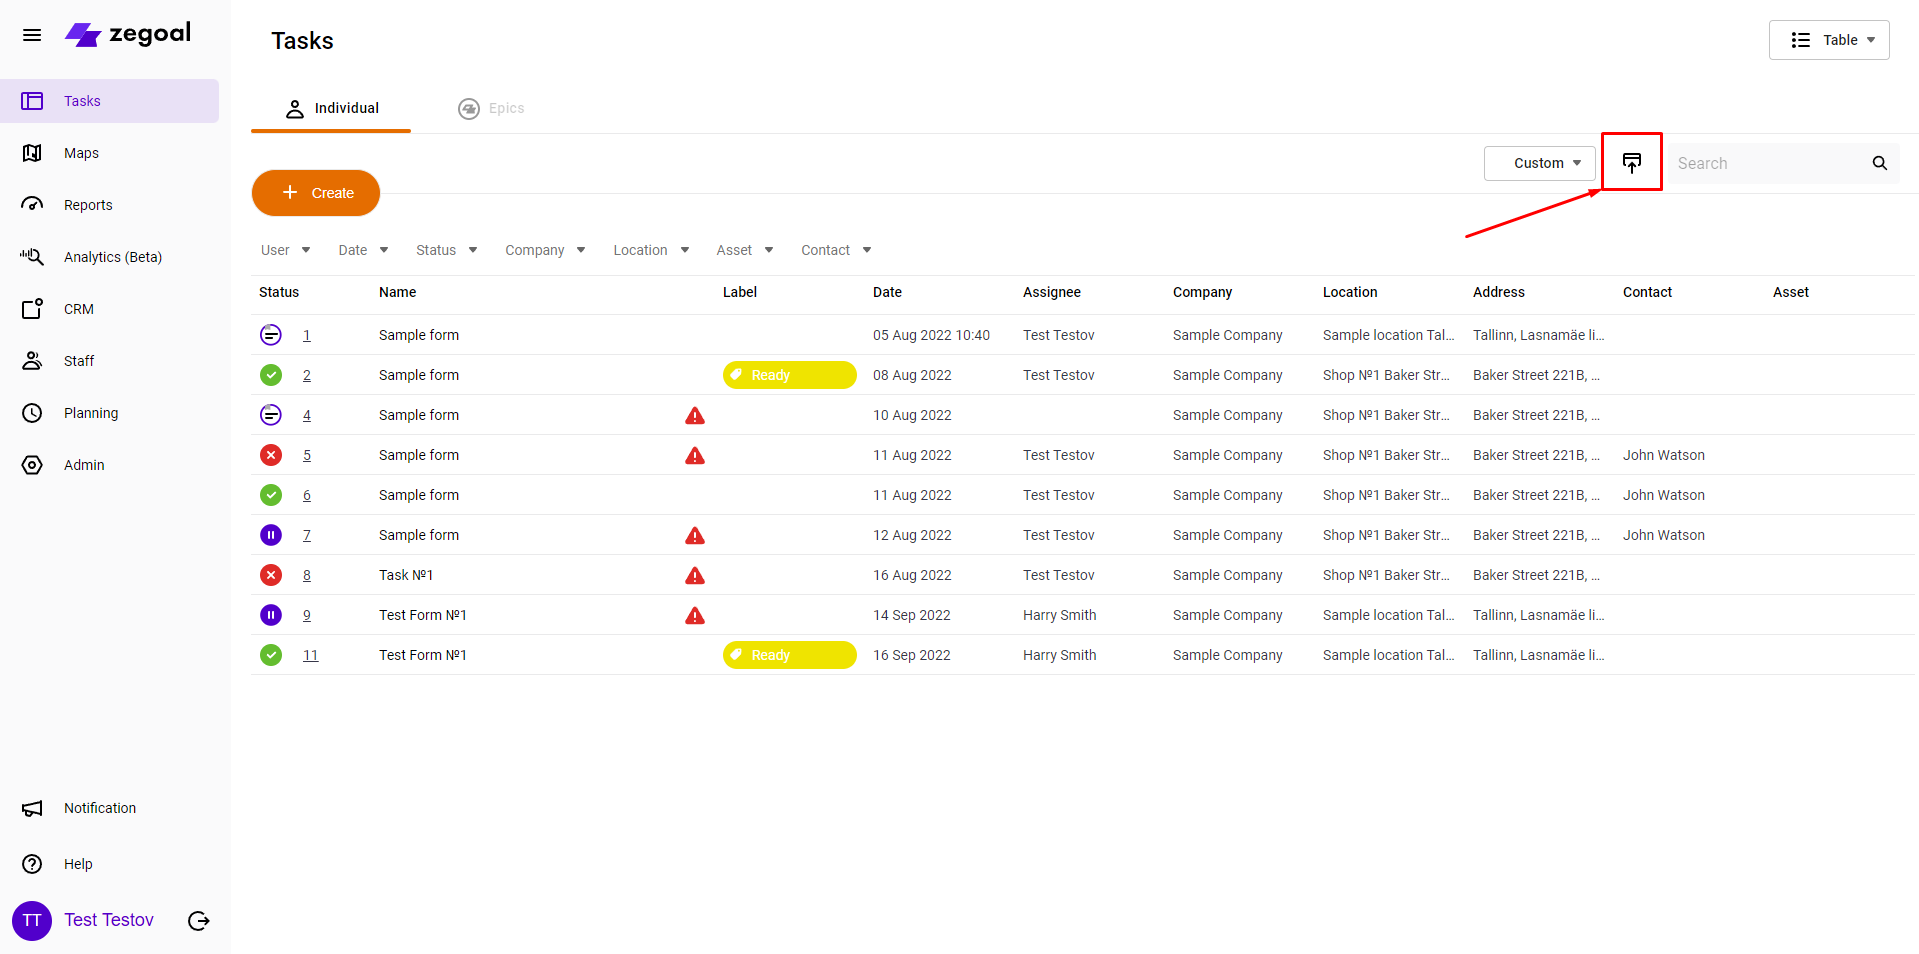
1. Download an import template. Go to the Tasks section. Click the Import button. In the import screen, click Download Template for Creating Tasks with Custom Time.
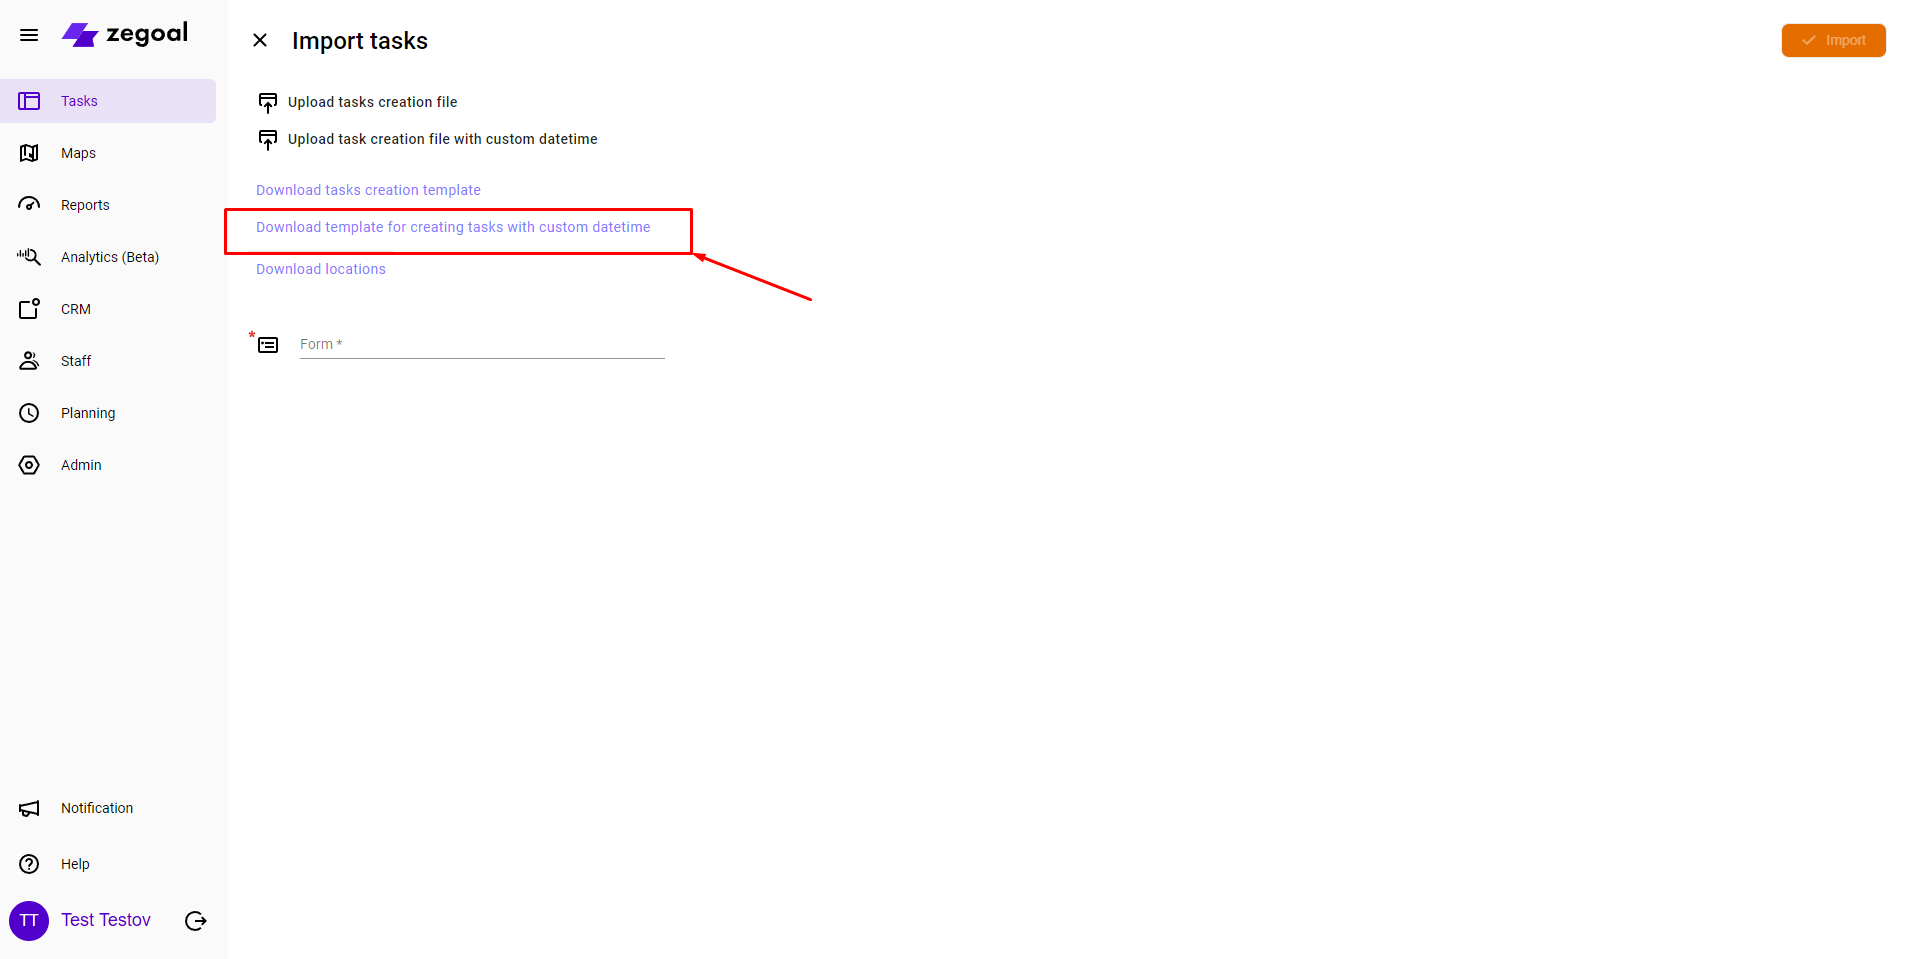
Fill in the fields with the required data. Mandatory fields are: Employee (task executor), Company (Client’s legal entity name), Location Address (for example, office address, outlet address), Start Date, Start Time, End Date, End Time. Important! The date and time must be filled in only in the format specified in the template. To obtain the list of companies, locations, contacts and properties, you can use the Export Data to File function.
Importing a Prepared File
1. Go to the Tasks section, click the Import button.
2. In the Import Tasks screen, click the Upload File for the Creation of Tasks with Custom Time button.
3. Once the file is uploaded, select the task template form that needs to be completed and click the Import button. A message will be displayed in a pop-up window once the tasks are successfully loaded.
Task Labels
What is this feature needed for?
In order to improve the process of checking the task results, as well as marking important events or task statuses.
Example of possible use: the Manager checks the task, after which the task is labelled as Checked.
How does this feature work?
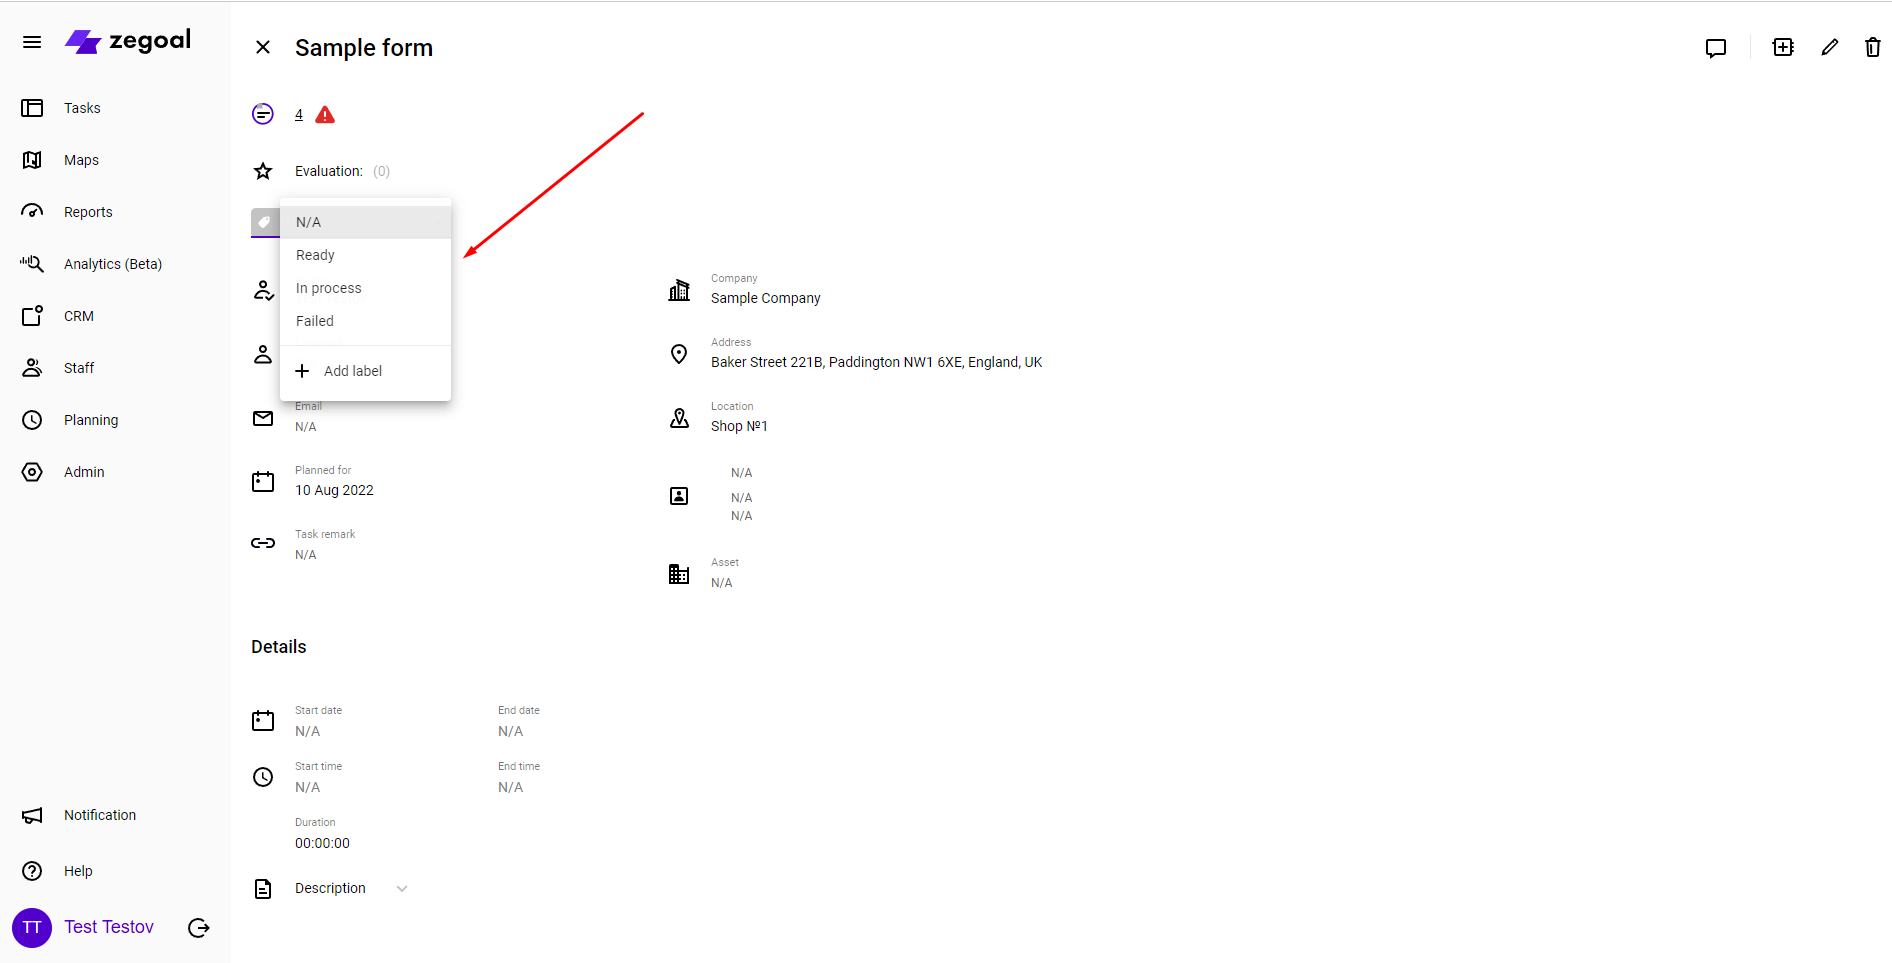
1. Creation of labels. Go to Administration / Directories / Task Labels. In order to create a new label, click the Create button. In the window that is displayed, enter the name of the label, select the colour and click the Save button.
2. Editing of labels. Select the required label in the list and click the Edit (Pencil) icon. In the window that is displayed, you can change the name of the label, as well as its colour.
3. Deletion of labels. Select the required label in the list and click the Delete (Recycle Bin) icon and confirm the deletion in the pop-up window.
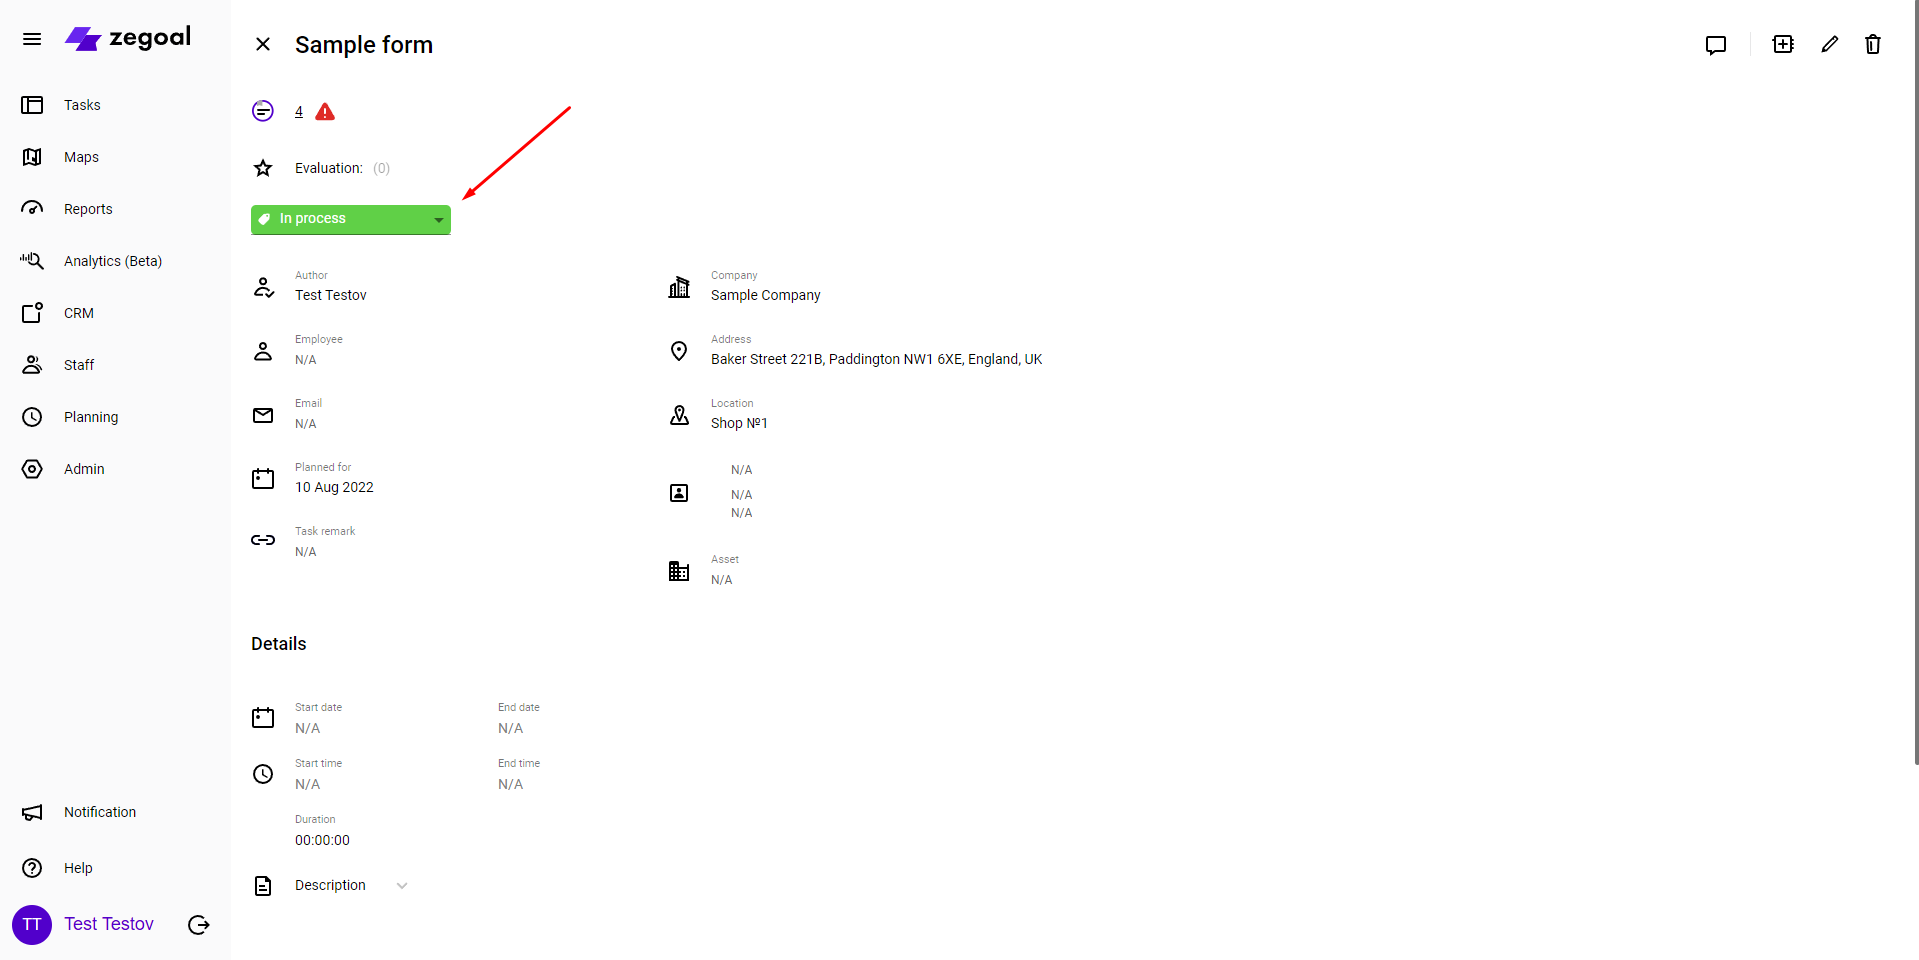
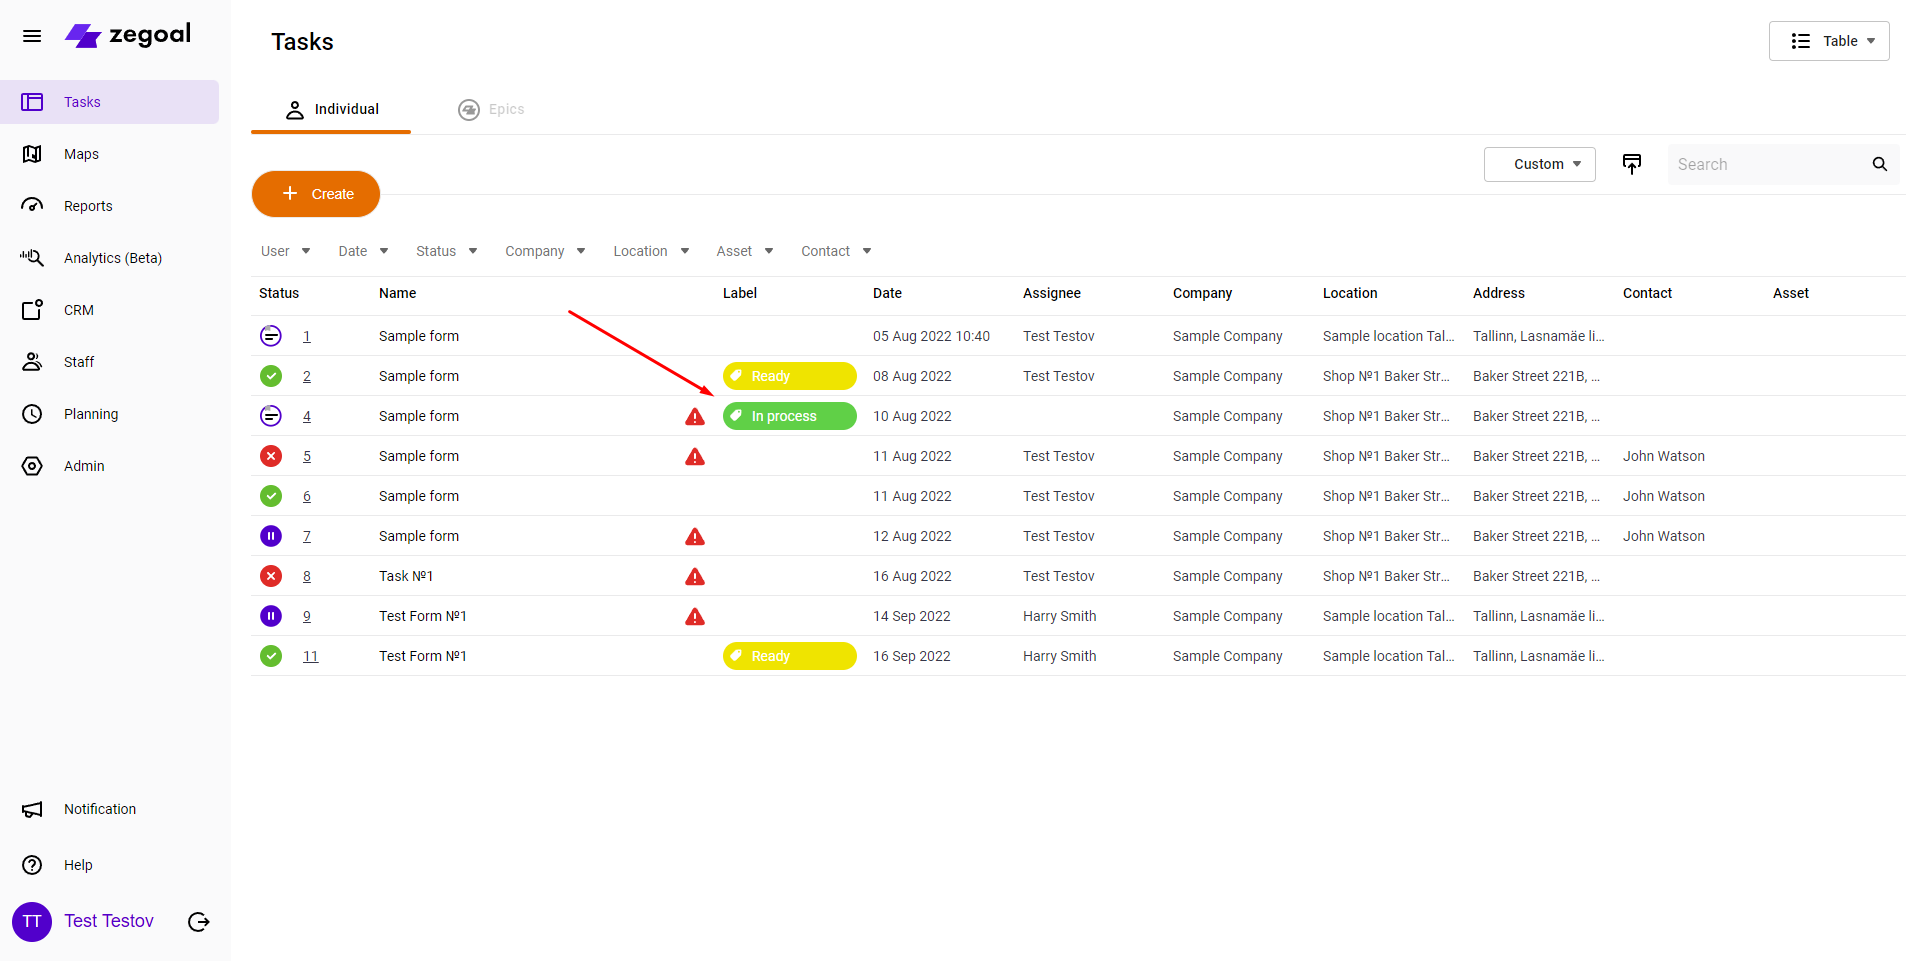
4. Usage of labels. Go to the Detailed view of the task (via the Tasks block, via Reports). A label selection window will be displayed below the status and task number. By default, the label is n/a (not configured). Click the label selection block and select the required value in the drop-down list. The label will be saved and will be active until it is changed.
Are you ready to enter the digital age?
Start 14-day free trial. No commitment, no credit card required
Categories
Need more information or help with the product? Contact us!
- support@zegoal.com
News
Be the first one to learn the latest Zegoal news! We never send out spam!
Copyright © 2022. All rights reserved.